Snow is in our forecast this week, so no suprise my thoughts were certainly sweeping towards some Santa Helpers. Now these took some practice, especially the very teenyweeney ones, there are only 1 inch tall, less than 1/4 head and santa hat...The others, tall ones on a stick perfect to put on a christmas cupcakes are 5.5 inches tall and then the middle size ones, 2.5.
Again, I searched for awhile to find the perfect video, that showed you every step. These will be perfect to place on cards, in cards and even on tags, they are the perfect size and along with some tiny buttons from Shellysbuttonsandmore
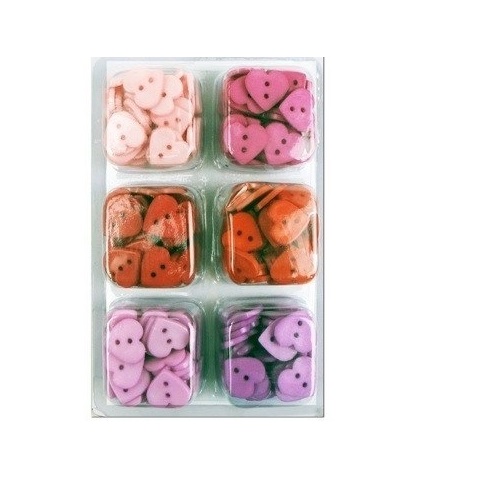
This one is so tiny, I wanted to place a tiny button tree so you could get an idea of size...
Here all made in red polka dots, a contrast in sizes...
largest is 5.5 right down to that wee one which is less than an inch.
I love these on some sucker sticks, found these at Michaels...
you place them in the folds with a little glue dot..
lovely idea to place in cupcakes
I have made quite a few, usually a few dozen in each size...
I have boxes filled now, these will be perfect for some unique
gift giving over the holidays..
And as I have been in the Christmas mood, I convinced my darling hubby to pick up 2- 8 foot (2 x4) tallest one is six foot and other two are 4.5 and 4 foot candles.
( with leftover wood, he made a T shape stand and drilled all the pieces together...)
I painted them with red Tremclad paint, it is an oil that is perfect for outdoor weather, drilled some holes on the top and dipped the nails in wood glue and painted the flames
yellow and smudged with a rag some red paint for inner flame.
( soft yellow paint for background flame, let dry then add your red flame with a rag dipped into paint)
He cut the wick flames with a jig saw, I just drew the flames on paper and he used that as a template.
Total Cost with gingham bow $25.00
( already had the paint)
Effect = PRICELESS.
They are in our parlour until the day after Halloween, and outside they will be in our front garden, from the street they look wonderful, matching our red door.
And here is the Video on how to make these Santa Helpers..
.
now you can certainly add faces, but I preferred to keep them blank...
After many views, I found the perfect gift tags and packaging for Christmas. In less than 6 weeks, the Christmas season begins, ok, for me it has already started, once our Canadian Thanksgiving is behind me, I am thinking of all the packages I have to send out to be sure they all arrive before Christmas for family and friends.
I came across these two perfect additions, and although they look complicated, I found the perfect videos that once you see the steps, you too will be able to whip these up... The best part is the larger ones have a dual function, you can slip some flat items through the gift box, socks, scarves, note cards... the small ones are perfect for gift tags.
I thought I would show you some tools that make it easier for me to do ORIGAMI, some sharp paper scissors, a paper slicer ( optional) some glue dots, ( love these much better than hot a glue gun) paper stock, card stock, OF COURSE some Shelly's Buttons, a paper creaser, that is shown here , the white thingamajig
(now this I do find exceptional, especially when I have done a few dozen, my fingers do get tired and this helps to fold and crease perfectly) and a square mat board ( optional) or any hard surface. Roll of permanent adhesive. ( be sure to order some extra refills.
I have always noted you are only as good as tools you have on hand...
I like to purchase 12 inch square paper and cut them in 4 or 8 ( sizes) ...These gift boxes were made with 12 inch card and paper stock. ( kraft color ones were card stock) and all others paper in 12 inch square and 6 inch squares and 2 inch squares. I have even made small bows from a one inch square.. Be sure you are creasing and folding on a hard surface, I like this small mat, great for cutting with too.
assorted bow sizes
You can make this bow by folding the bow part in behind or tucked into the knot...both look nice, and from the same pattern below.
These larger ones were made with a 12 inch square card stock.
the finished size is approx 6 inches square...you can slide some interesting gifts
with the side openings...
You will note in the video, you don't have to make an additional bow as wth a couple folds
It should not come as any surprise when you are learning something new that you want to find the simplest and least complicated tutorial on how to do it. Well, I have spent hours going over literally dozens of pattern and videos to find those that we can ALL learn from. I have gone through piles of paper stock thrown in the basket-- trying to figure out "how did they do that?" well, I finally found some that were the best in our world. I say world as many of the guides of Origami come from Taiwan, China, Japan, Korea. Although I found many patterns that I would love to learn how to do, many of the videos omit important steps. But I am not one to give up, I just had to search more.
Take this one, it is a Japanese Dress that they call a KIMONO. It is in two pieces and not difficult to do at all, because I found someone who shows every step methodically. You possibly will make a few, they are quite addictive.
Many Kimono's are floral or reds but if I was in Japan, I would have to have a gingham one, so of course I made some of those. After making over 50-60 you actually find you can make them quickly. Now some of you may find after one or two attempts you have got it, but I find when I repeat things over and over and over again, I don't forget them how to do them.
Now I must admit, doing it smaller takes as much time as a large piece
and it is harder to fold even with paper...But I love challenges..
Since then I have been practising making shoes, little girl dresses, umbrellas, rain coats, baby rompers, a slew of different style fashion dresses and now I doing up a collection of Christmas theme ones.
Next week I will show some that will be great for Christmas TAGS...
This is the collection I made before I adorned them with shellys buttons...
The best part of this too is with Shellys buttons, you can add some special touches that make them unique. Thought I would show you in the weeks ahead some Christmas themes ones that would be easy to teach buglets of all ages. All you need is some paper stock, some scissors and these patterns. You can keep yourself so busy, you kinda forget the issues of our world. Think of it as Self-Care.
Here is the best video I located to make this two piece Kimono. As eager as I am to tackle on new projects, I always watch the video at least 3-4 times....You will be surprised at how your hands just work better...and I always loop it so I can keep it going as I am working on the origami pieces. This instructor shows every step.
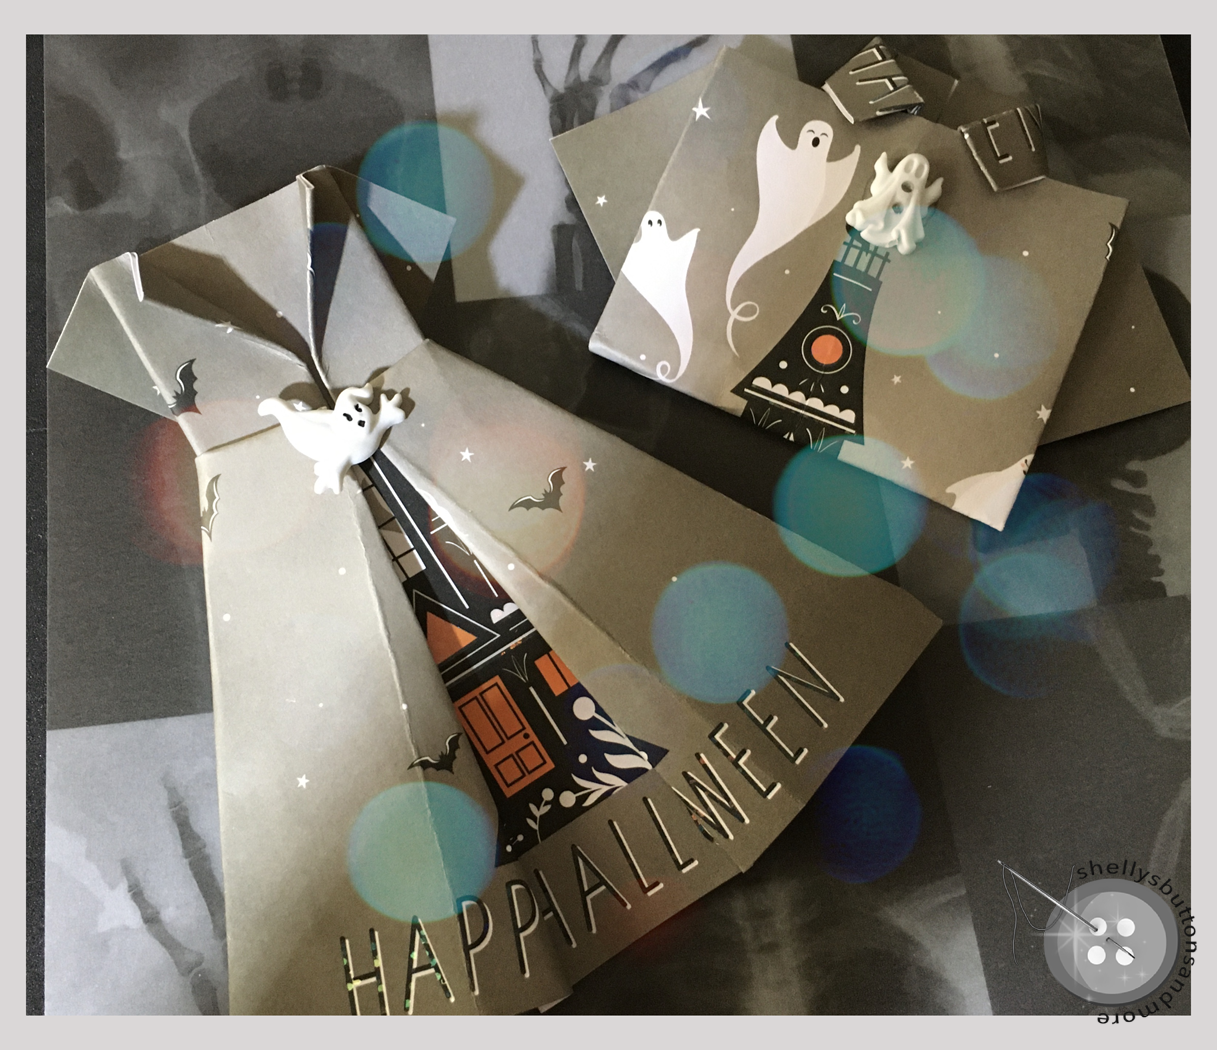
With Halloween around the corner, Origami has cast a spell upon me, I found some Halloween card stock, (you can use paper stock as well) and I went with 2 patterns this week. A man's shirt and a cute but simple dress. There are many patterns out there and videos. Here are a couple that I found the easiest to follow. With some practice and repetition and few scrunched up balls that just did not suit me perfectly, ok, that is my inner voice speaking. (it certainly tests your patience and perseverance) You can do this too.
Suggestion on what you can do with them once completed.
frame them
sends as gift cards
name plates
Use a whole puncher and some string and you could drape this around a window. Think a Halloween Bunting !
Don't you just love this spider web stock, image fabric like this...
I love the theme this stock pad had. There are at least two
of each design.
I suppose this was one of my favorites. Love grey and white and those
ghost buttons just make it so frightening lol NOT!
This card stock I found at Michaels and you can still purchase one and get
another pad free.
Pattern and Video for projects above
This pattern maker used a 12 inch sheet of paper, I chose 6 inch square pieces of cardstock. Once you know how to make these you can make 4 inch squares up to 12 inch squares. Adorn them with shellys buttons and you have a unique card to send or frame. (I noted many men do origami)
This is my favourite video for the dress, you can keep watching it till you memorize the steps..
I watch videos 4 x before I even start, always using a 6 inch square of cardstock.
Where he folds in the centre, I fold 1/3 at the top to make a higher bodice.
There are many vidoes on you tube. I have watched dozens, I try
to add the ones that are the best for you to follow. There were some that skipped steps and went so fast you could not see what they were doing.
because you matter
If you want to view all of our buttons in one place besides at shellysbuttonsandmore.com you can also view them all here on many pinterest boards.... https://www.pinterest.com/buttons0295/_created/